
Pwn– “To utterly defeat an opponent or rival”
Tamagotchi– A handheld digital pet created by Aki Maita and Akihiro Yokoi. The first Tamagotchi was released in the US in 1997, becoming a major toy fad of the late ‘90s and early 2000’s.
Pwnagotchi– A handheld digital pet created by Jayofelony. Designed to utterly defeat WiFi security by collecting WiFi password hash packets from wireless connection handshakes. Plus, they look cute doing it! (•~• )
In layman terms:
Devices are constantly trying to reach out and reconnect to nearby WiFi networks. The same way your phone will auto-connect back to your home WiFi when in range. This connection is what is called a “4-way handshake”. Both the device and the WiFi contain half of a really large math problem and the expected problems answer. The stronger the password the harder the math problem. This process of the handshakes connects the 2 halves of the math problems and if the equations answer is as expected the password is approved and the connection is established on both the device and the WiFi. This process happens countless numbers of times per day between devices. This device attempts to capture the packets of data in those handshakes which can then be processed through a specialized math problem solving program that can access lists of previously solved math problems. If the super complicated math problems match, the result is a “cracked password”. This is an oversimplified explanation of the basic use case of the Pwnagotchi. (NOTE this is a penetration testing device. Have prior approval to use against networks)
• • •
Parts List
• • •
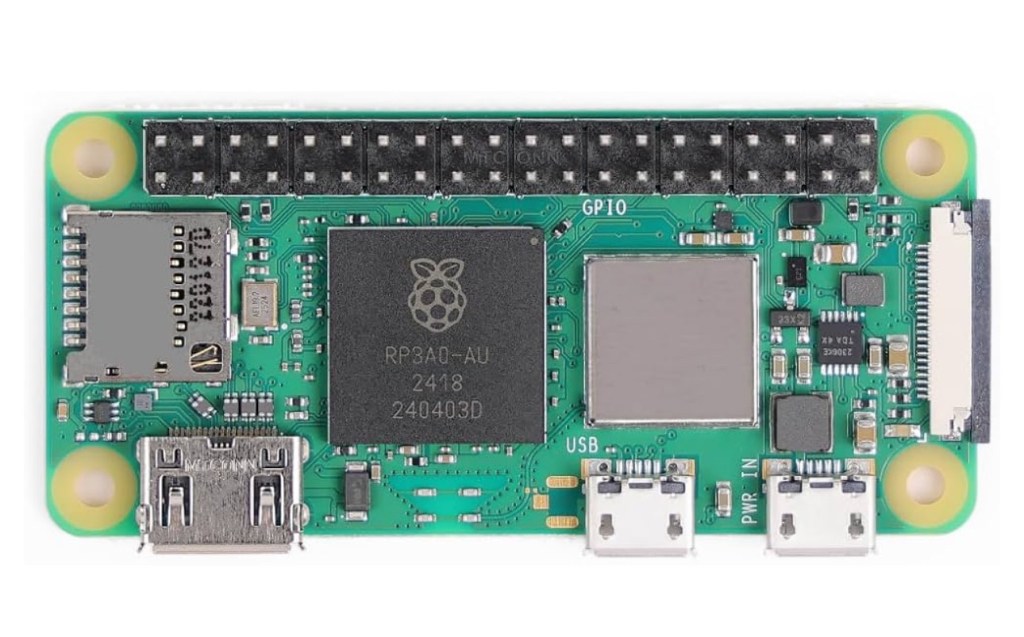
-Raspberry Pi Zero 2WH board.
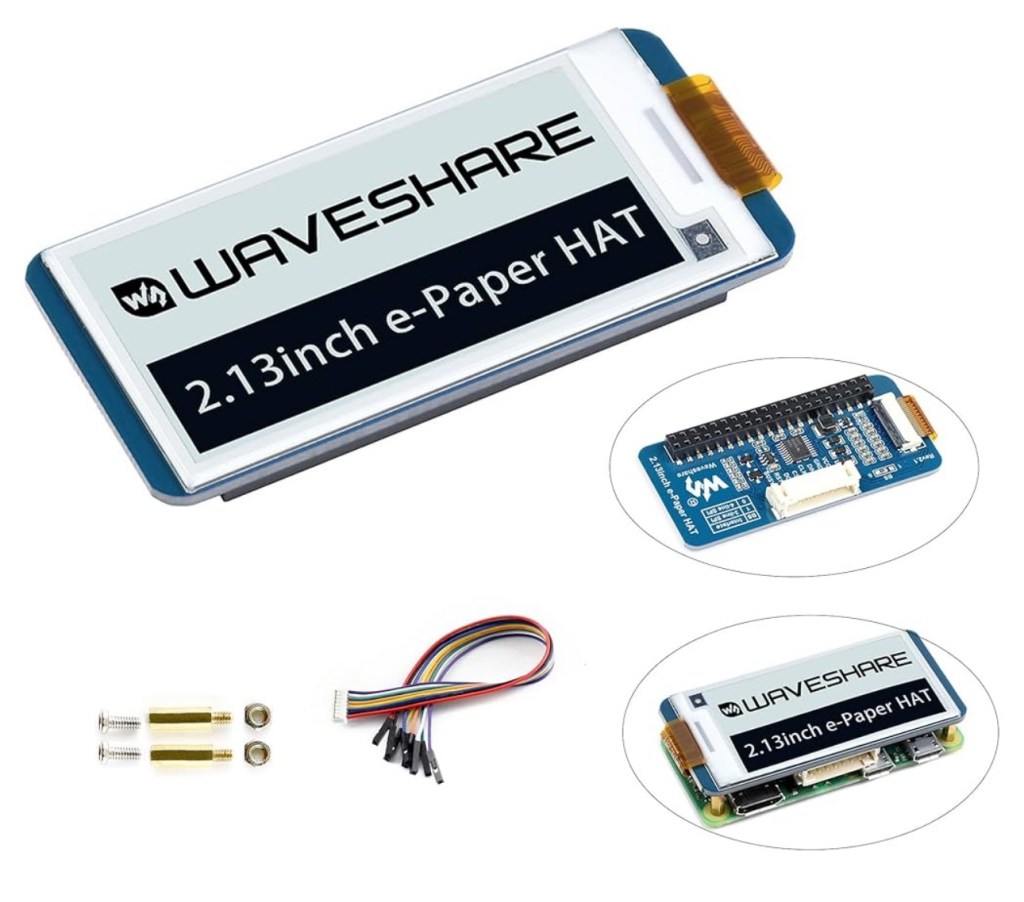
-2.13” Waveshare E-ink Display Hat
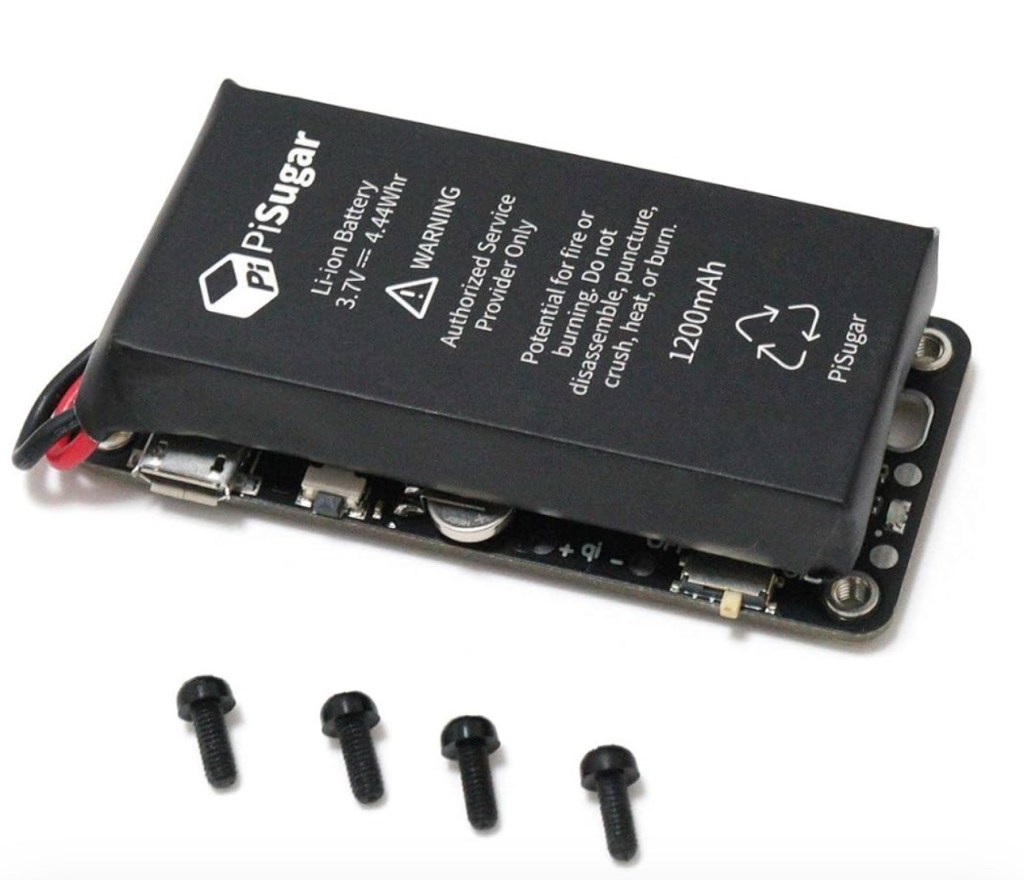
-PiSugar 2 / PiSugar 3
-32GB Micro SD card
• • •
Part 1
• • •
This was simultaneously an easy project, and a trying project at times. The build here is relatively straight forward. 3 main boards sandwiched together with a battery pack. The black screws thread down into the PiSugar board and pull it up into the Raspberry Pi zero 2WH board. The boards make a connection through spring loaded pogo pins fixed to the PiSugar board located between the boards under the 40 pin GPIO.

Once the PiSugar board is firmly connected and the Pogo pins have a good seat against the bottom of the 40pin GPIO, we can install the E-ink display.
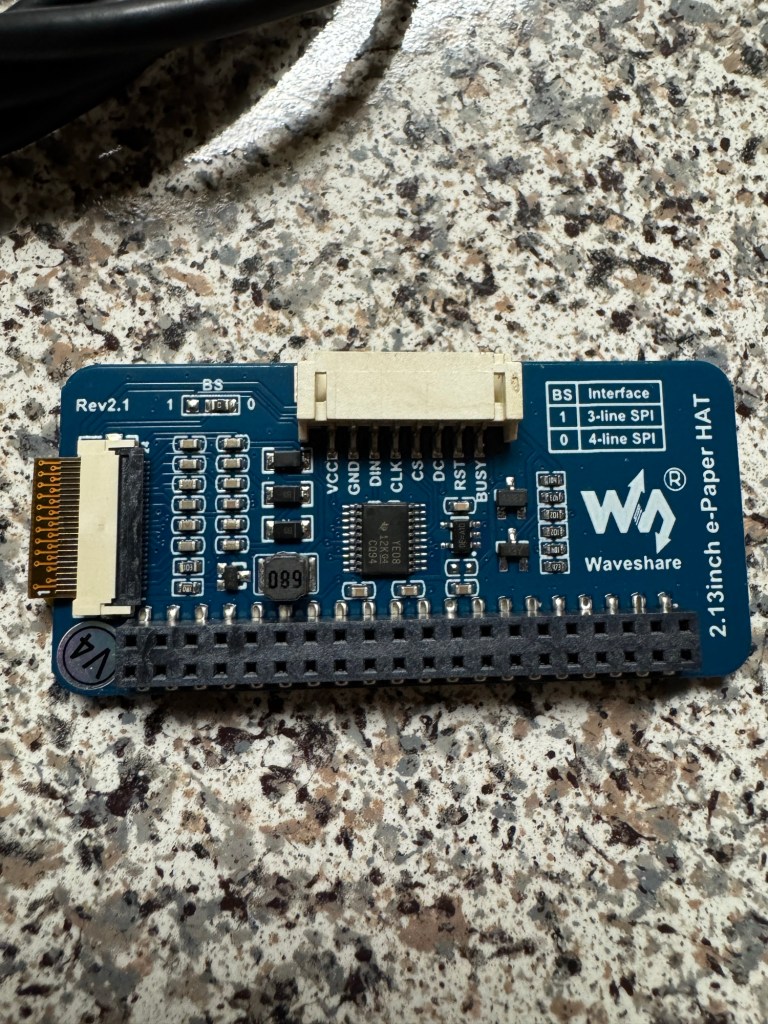
Start by lining up the GPIO pins and firmly pressing the E-ink onto the lower assembly. This board is held on by friction of the pins, so it’s a good squeeze to get them set properly. Take your time and gently rock back and forth, ensuring not to bend any of the pins.

• • •
Part 2
• • •
With the assembly complete we can now move on to the files. For the Pwnagotchi files I downloaded the source image from Jayofelons GitHub. Located:
https://github.com/jayofelony/pwnagotchi
And followed along with Jayofelons written instructions here:
https://github.com/jayofelony/pwnagotchi/wiki
We’ll use the same Raspberry Pi imager we used for the Kali Linux Black Box project to flash the Pwnagotchi image to a Micro SD Card. Once the image is flashed we can insert the SD card into the Pi zero 2WH and using a micro usb data cable, plug it in to the computer.
Initially my computer didn’t recognized the device but with the provided RNDIS driver, I was able to get it up and running.
Once the computer recognizes the device we want to navigate to the control panel and locate the divices properties and select the
Internet protocol version 4 (TCP/IPv4) properties.
Here we’ll assign the Pwnagotchi its own IP address as
10.0.0.1
With a subnet mask of
255.255.255.0
• • •
Part 3
• • •
We can now SSH into our pwnagotchi using:
SSH Pi@10.0.0.2
Default password:
Raspberry
From this point Jayofelony has created a great terminal wizard to create a basic Pwnagotchi file, using:
Sudo pwnagotchi —wizard
This will bring up your .config file allowing you to name your new Pwnagotchi friend.
Once you have your Pwnagotchi up and running you can configure it further using the webpage GUI, access it using your web browser at
10.0.0.2:8080
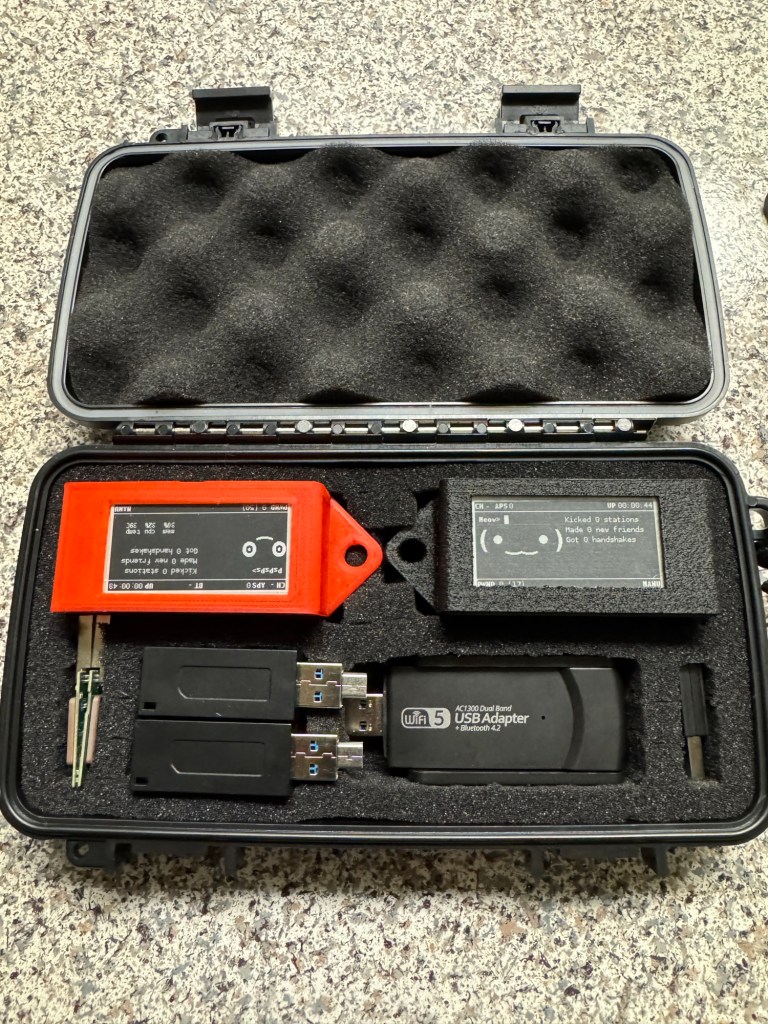
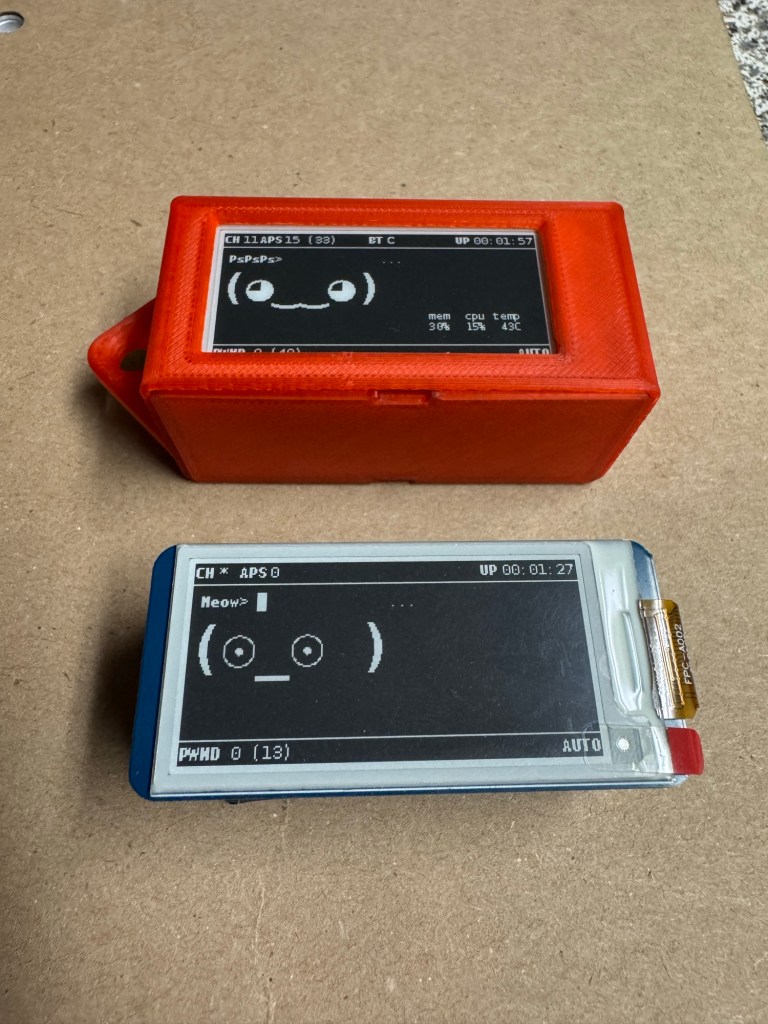
I started this project with the intentions of building 1 Pwnagotchi, but somewhere along the way I ended up with 2 of each part needed, so naturally I built a second Pwnagotchi’ so they don’t get lonely.
• • •
Extras
• • •
What’s a few new hacking toys without 3D printed cases to fit.

Glonass GpS dongles
External WiFi adapters for ext- ranges
MicroUSB-USB ultra mini adapter
USB-3USB dongle
• • •
Deployment
• • •
Power on your Pwnagotchi using the button or switch on the PiSugar and the pwning starts. The Pwnagotchi will be simultaneously scanning and collecting data saved as .Pcap files that contain password hashes and other information stored in the connection process. Since the Pwnagotchi has an internal WiFi chip and the PiSugar 2 or 3 provide plenty of power for the E-ink display to work for hours, the Pwnagotchi is a perfect pocket size Pwning device to turn on and forget about.
• • •
The Packet Loss Pirates Loot
• • •
Once your Pwnagotchi collects some password hashes as .pcap files, we’ll need to first analyze the files to ensure they have 4 steps of the handshake process, then crack the hashes to reveal what useful information they contain. We’ll do that in Hash Cracking .
